
The Camera and Gallery App
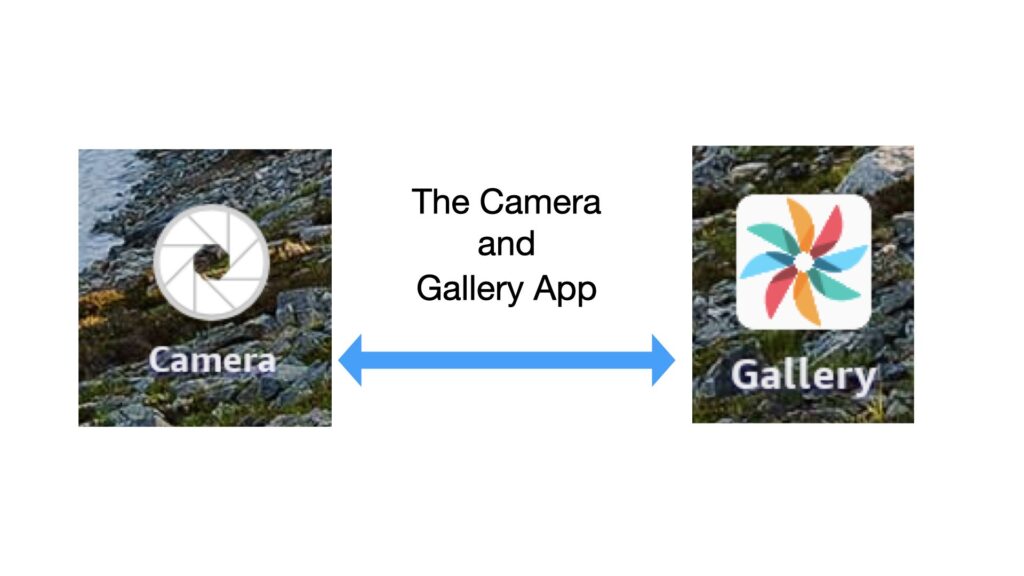
This lesson is an quick introduction and overview of the Camera and Gallery Apps. These two apps work together to allow you to take pictures, screenshots, etc. and then to edit and manage them. There is additional information on these apps in the Reference material if you are interested in using these utilities.
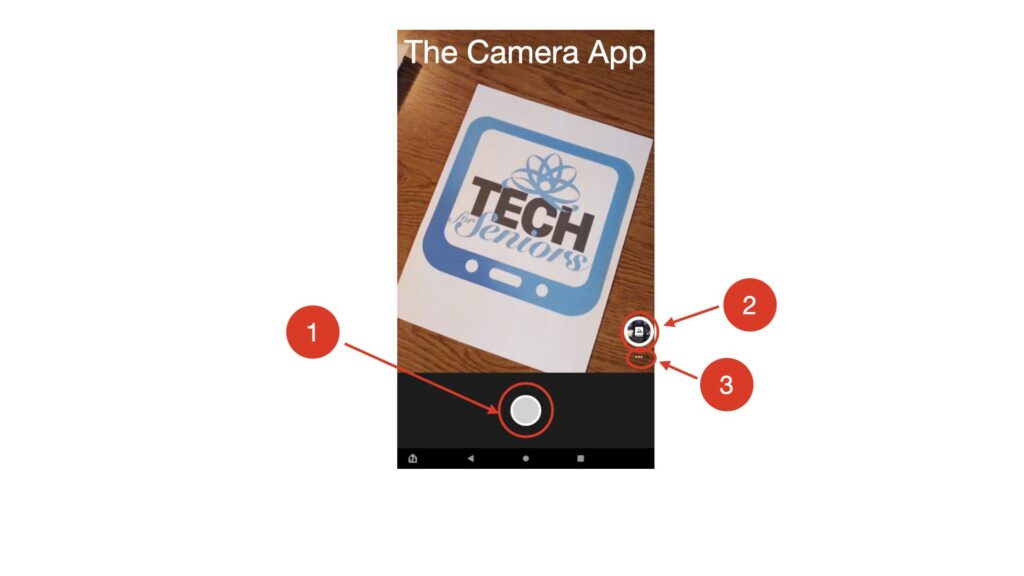
Open the Camera App and you will see what the camera will capture on the screen and 3 other important buttons. A “shutter button” (#1) which takes the picture; use the Gallery App button (#2) to open the Gallery App to manage and see your picture albums; and the Option Screen Icon (#3) which opens the Camera Options screen.
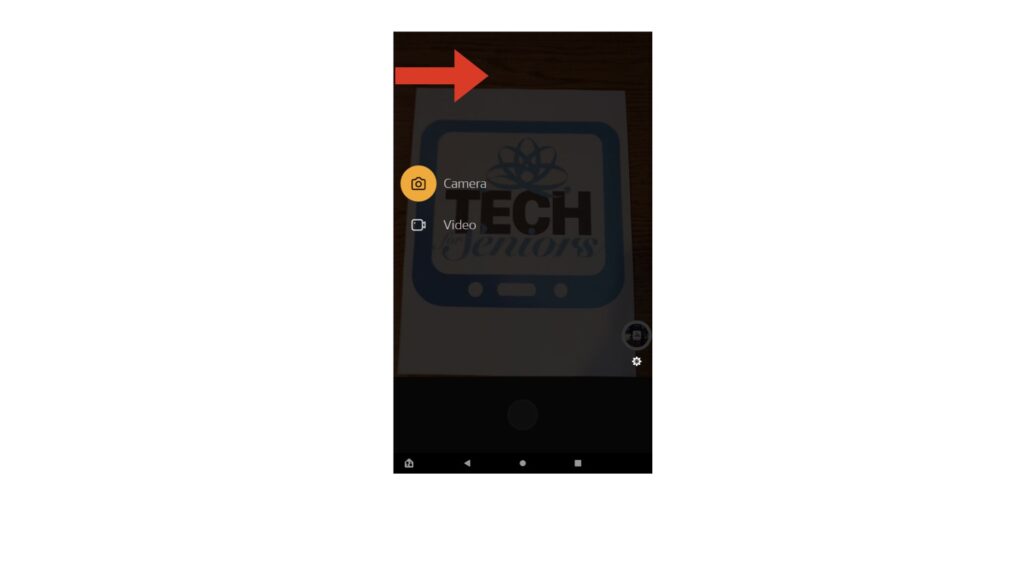
You can change between taking still pictures and movies by swiping right on the screen and selecting the Camera or Video function.
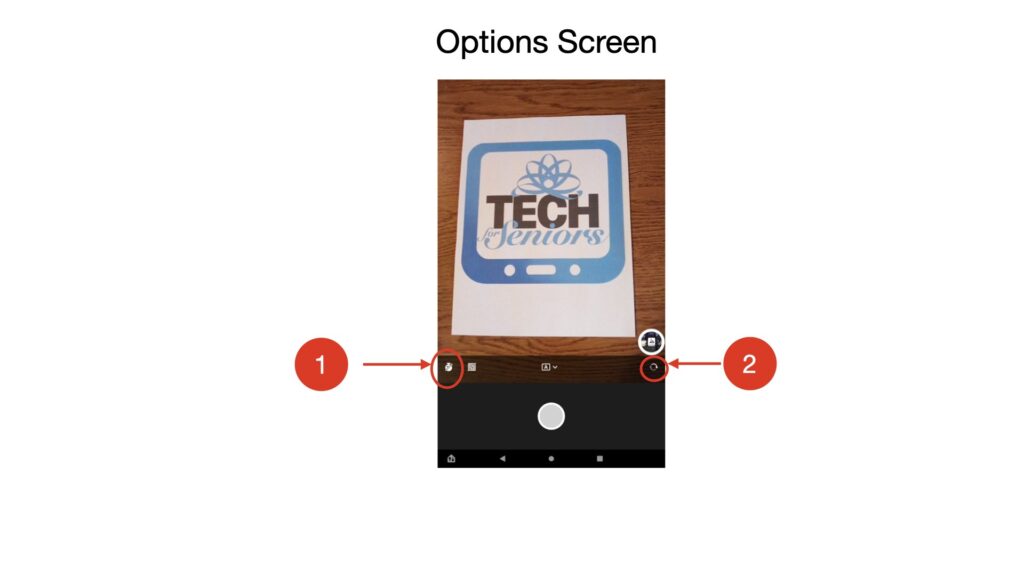
If you selected the 3 dots, the “Option Screen”, you will see this screen. We won’t look at all the options, only a few important ones. The Timer Icon (#1) allows you to set a delay after pressing the “Shutter Button”. It is set to off here but you can touch the icon to delay taking the picture for 3 or 10 seconds after the “Shutter Button” is pressed. The “Selfie Icon” (#2) reverses the camera to take a picture or video of you.
The Camera App automatically sets the focus on it’s opinion of what the best object to make clearest in the photo, but when you are taking a picture you can touch an object on the screen that you want to focus on, allowing you to change what looks sharpest in the picture. You can also display a grid on the screen to allow you to make your pictures turn out straight. And if you are really into photography you can control Night mode and other camera settings.
There is much more information on the Camera App in the Camera App Reference included in the Reference Material. The Reference material is typically best viewed in Landscape Mode (rotate the tablet so the long edge is horizontal).
The Gallery App
The Gallery App works along with the the camera and other apps to provide easy, graphical access to photos, screenshots, videos and more. The best way to learn photography is to take a lot of shots and learn from them. It can be confusing if you forget which shots are which but if you try to always take the photos in the same sequence you can more easily see which settings provide the desired results. Gallery makes it easy to see the photos and delete the ones you don’t want so you don’t run out of space.

The Gallery App organizes your photos, videos, screenshots, etc into Albums. Here we have selected the “Screenshot” Album but everything we do here applies to the other albums as well. We select the 3 dots (Option Icon “…” [#1]) and the drop down list asks us to choose between “Slideshow”, which presents a slide show of the items in this Album, and “Select”, which allows us to select individual items or a collection of items to work on. In this example we chose “Select” so we can delete the selected items.
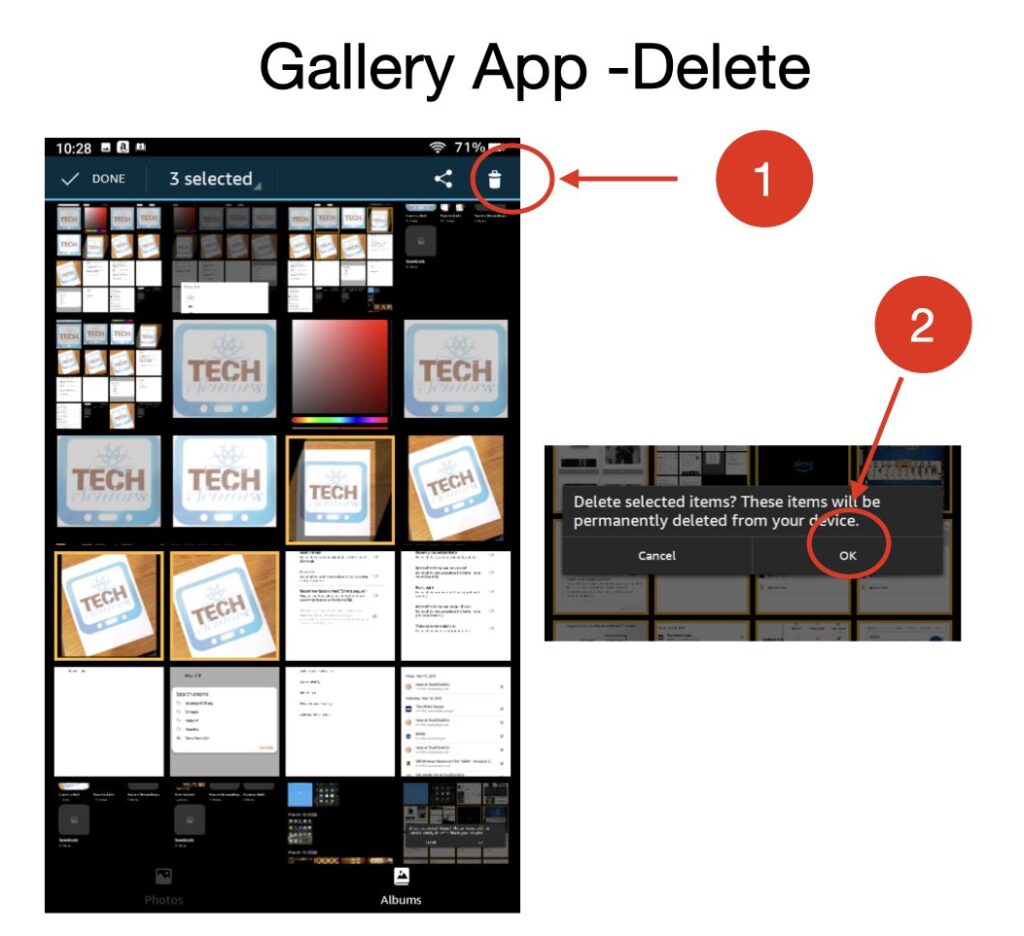
We have selected 3 items in the screenshot above. When we select the Delete icon [#1], we will get a message asking us to confirm that these items should be deleted. Once we confirm the operation (“OK” [#2}), these items will be permanently deleted.
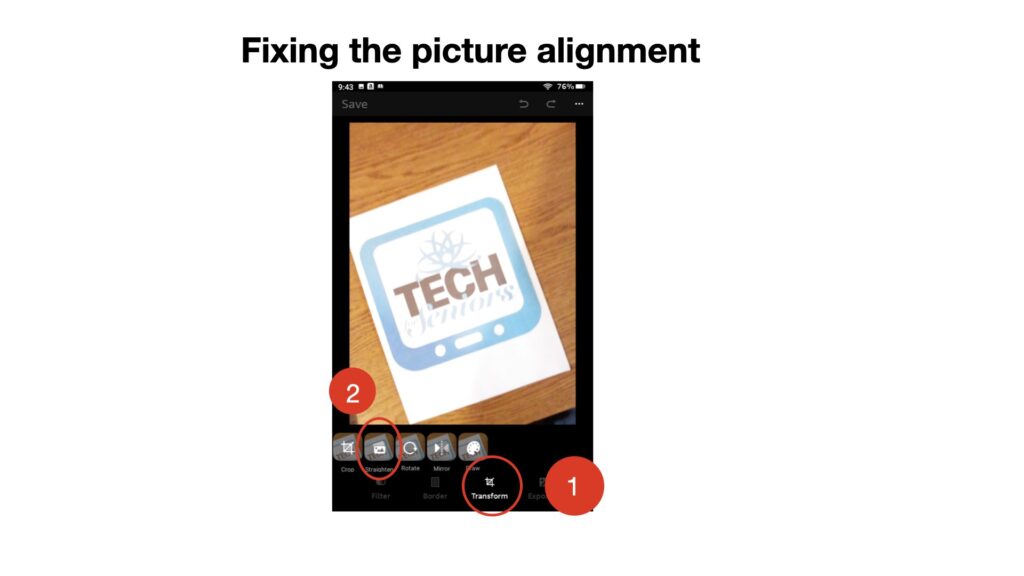
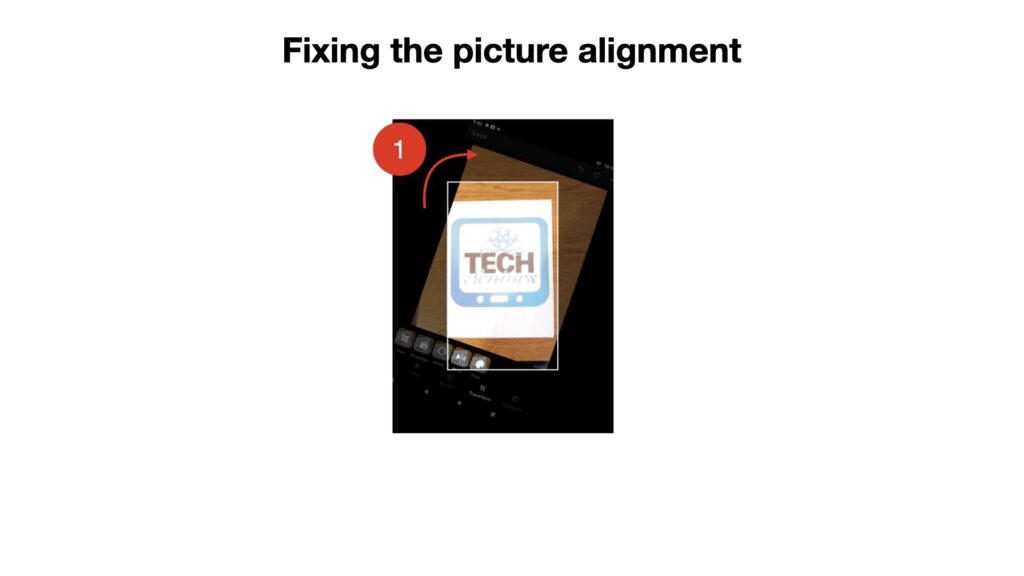
Straighten a picture can be done in the “Transform” Category [#1] using the “Straighten” tool [#2]. Use your finger to rotate the picture until it is positioned as you want as shown in the next diagram “Fixing the picture alignment” [#1].
In the next diagram we look at the “Crop” tool. We might also want to remove all the “noise” around our subject. We can select the “Crop” function and use our fingers to move the edges of the picture to include only the portion we want [#1].
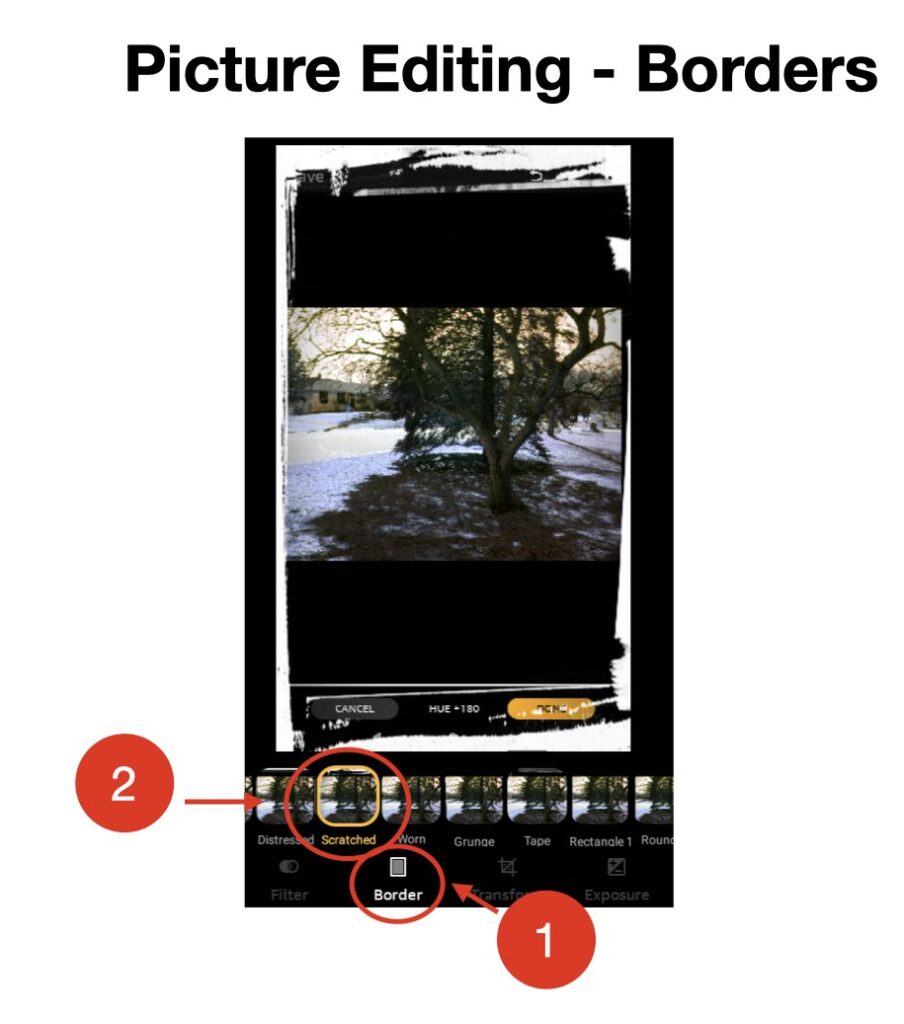
The Gallery App offers a rich set of tools that you can use to edit your pictures and learn to become a better photographer. For example, the “Borders” Category allows you to add “frames” to your pictures as in the example below.
As mentioned above, there is a rich set of tools available in the Camera and Gallery Apps which are described in the Reference Area of the Links for Seniors App. This session has been a very high level overview. If you are interested in doing more with the Camera and Gallery App please look at the Reference Material for the Camera and Gallery Apps. There are also a number of other apps available that will allow you to remove objects from photos (eliminate “Photo Bombing”) and other things.