Using your Fingers to Navigate on your Tablet
Now that you have gained some experience with your tablet, let’s identify the actions that will allow you to navigate on your tablet. This lesson will teach you the basic gestures and actions that you will perform on your tablet’s screen.
First, watch the video to review the basics. Then read about the topics and find your practice homework at the bottom of this page.
Using your Fingers to Navigate
NOTE: The Map application is no longer supported and is replaced by MapQuest. The two main differences from the video are:
1. The Search function was renamed to Find Places
2. Changing back and forth from satellite to map view is done through more robust Layers interface – see the text below for details.
Screen Actions
In this lesson we want to show you how to navigate your table and manipulate the items on your screen. Some of these items you have already used when you completed your homework by playing Solitaire. Let’s identify some of the essential touch actions:
- Screen Orientation
- Tap to Select or Start
- Drag and swipe
- Zoom In or Out with Pinch & Expand
- Double tap
- Search
- Type with the onscreen keyboard
- Using dictation instead of typing
- Use a Menu to perform actions
Once you have mastered these skills, you will be equipped to enjoy the various apps that are installed on your tablet.
Positioning and Holding your Tablet
The protective cover on your tablet will allow you to hold the device securely. You can either place the tablet on a table or flat surface or hold the tablet primarily in your non-dominant hand so that you can use your dominant hand and its pointer finger on the tablet’s screen. Hold it securely as you touch and tap.
Screen Orientation
You also can either hold your tablet vertically or horizontally. Your tablet provides the ability to support either portrait (vertical) or landscape (horizontal) orientation when using your apps.

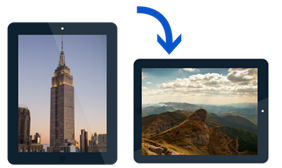
The best orientation choice is often a personal preference.
Tap to Select or Start
You already have experience tapping on the screen in order to start an app or select an option. You can use any finger but most actions are most easily performed using the pointer finger on your dominant hand.
When you do this tap, use the soft part of your fingertip and not the fingernail and then tap and immediately lift from the screen. If the tablet doesn’t respond, experiment with softer or harder taps. If the screen doesn’t respond, try using the stylus that we included with your tablet package.
The MapQuest App
Most of us can think back in time to remember printed maps and even the Rand McNally Atlas that you had in your home. The maps business has changed significantly with the development of our online maps apps. You can use the MapQuest app to view any location in the world and all of the streets, roads, cities, towns and landmarks that our printed maps had. Our MapQuest app will even show you a satellite photograph of many locations in the world. Yes, you can even look at a photograph image of your childhood home!
Let learn about the MapQuest app while we learn how to use your touch actions on your tablet.
Do it Now: Tap MapQuest to launch the MapQuest app. We will demonstrate and explore our touch actions while using the MapQuest app.
Drag or Swipe
You have already used a swipe action on your tablet to open your tablet from the advertising screen. When you launch the MapQuest app, the center of the screen might display your home area or some other area of the world. Use a drag or swipe action to move to a new location. Keep your finger on the screen as you move in any direction.
Zoom Out and In with Pinch and Expand.
Many apps will offer the ability to zoom in and out of images, text and other content. Zoom in means that items on the screen are magnified. Zoom out means that items on the screen become smaller. For example, when you launched the MapQuest app, you were positioned at one location in the world. You might not recognize the location but if you zoom out, you can recognize familiar map landmarks.
Zooming Out is accomplished by putting your thumb and pointer finger on the screen an inch or two apart. While touching the screen, move your fingers closer together in a pinching action and notice how the screen responds. You see more cities, states and even countries when you Zoom Out.
Zooming In is performed with the opposite action. Place your thumb and pointer finger on the screen close together and move them apart while still touching the screen. When you Zoom In you get more detail even seeing the exact location of your home.
You can use any two fingers with this action but it is most common to use the combination of thumb and pointer finger in your dominant hand.
Zoom with Double Tap
In the MapQuest and some other apps, you can also Zoom In with a double tap on the screen. Using your pointer finger, quickly tap the screen twice. Use the fleshy part of your finger and make sure your finger comes off of the between taps.
If you want to zoom out, use the pinch action as described above.
Search
If you are looking for a specific location, you can use the Find Places function of the MapQuest app to jump directly to a new location anywhere in the world.
In most computers, tablets and smartphones, the search function is identified with a magnifying glass. The icon is next to the Find Places label and a search bar or area where you can enter text will be presented when you tap the magnifying glass. In the MapQuest app you can type the name of a city or even an address in order to immediately jump to that location.
Tap on the search bar and you will type the search text using the Onscreen Keyboard.
Type with the Onscreen Keyboard
Your tablet uses an onscreen keyboard when you need to type text onto your tablet. The onscreen keyboard will magically appear at the bottom of the screen when you tap on a search bar or any location or field on the screen where you need to enter text.

Notice how the onscreen keyboard has the conventional keyboard layout. You type by touching the desired letter, number or symbol into the screen. You will develop your own style for typing. Some people will type only with one or two pointer fingers. Others will tap with their thumbs while holding the tablet. Use whatever style works for you.
Like a conventional keyboard the keyboard has a Shift key if you need an upper case letter, although you will find that when searching, the case of a letter isn’t required by the tablet.
The space bar is in the usual location and marked with ⎵.
If you need to type a number, punctuation mark or other symbol, press the [?123] key. If you make a mistake, use the backspace key to undo your previous typing.
The Enter/Return key has changed to a search icon during a search process. Press Search on the keyboard to initiate your search.
If you type “Minn” into the search bar, you will see that the possible Minn…. places will show below the search bar. The list will filter as you type more letters. Keeping track of these possible search terms will save typing. If you see the location that you seek on the search list, simply tap on that items to jump directly to that location on the map.
Use Dictation to Type with your Voice
You can also use your voice to type text onto your tablet. The lower right corner of the onscreen keyboard displays a microphone icon. Tapping on the microphone will put your tablet into dictation mode where you can speak rather type using the keyboard. Try it. It may be easier than typing using that small keyboard!
Using a Menu
Many apps including the MapQuest app, will offer a menu where you can choose to perform different actions built into the app. A common icon that represents the presence of a menu is . You will often find this icon on an upper or lower corner of the screen. In the Learning Center app, the icon is on the lower right. In the MapQuest app, the icon is on the upper left. Tap on the icon in order to view configuration actions that can be taken. Generally you won’t need to use this capability.
Satellite Image
One of the fun features of the MapQuest app is the ability to see a satellite image. Once the satellite image is displayed, you can search, pinch, drag to see the photo image from anywhere in most of the world. You can check out your childhood home, dream vacation spot and more. Here are the steps from inside the MapQuest app:

- Tap the Layers icon on the bottom of the screen when displaying a map.
- Tap the Satellite icon (farthest to the left of the select-able layers).
- The satellite photo image will display.
- Use pinch, drag and search to move to any location. Use expand to zoom in to see more detail in the image.
- Tap Satellite icon again restore the normal map view.
Additional details on using the MapQuest application can be found here:
Your Homework
Our homework for this lesson is easy and fun. We want you to use the MapQuest app to look up your childhood home. Here are the steps:
- Launch the MapQuest app.
- Use the Find Places (Magnifying Glass) to search for your childhood city or town.
- Use drag, pinch and expand to find the location of your childhood home.
- Tap the Layer and Satellite icons to switch to the satellite view.
- Use drag, expand to view the satellite image of your childhood home.
- Have fun looking around the neighborhood.
- Restore the normal map view by tapping Satellite again.
We want you to have great fun with the Maps app while practicing your tablet skills. And most importantly: