Microsoft Translator Quick Start

Microsoft Translator is a useful communication tool that allows you to interact with other cultures. Perhaps you can use the keyboard to find a friend from another country. Basically you select your language, the language of your friend and converse, through your tablet. This Quick Start Guide provides a general overview Video but the text only covers using the Microphone on your tablet for communication.
A couple of things to consider while using translator apps is that, the AI engine doing the translation may misunderstand some accents and/or confuse the context or distort the meaning. That said, as long as you are careful and make accommodations for these inconveniences, they can be a wonderful way to communicate with others from almost anywhere in the world. Even read a foreign newspaper from the UK, Ireland, France, Germany, Russia, China,… you get the idea. This can be an amazing portal to expand your vision into happenings in remote areas of the world or read books never translated to your native language – English I guess or you wouldn’t be reading this English description (unless, of course, you were using a translation of it to your native language).
We’ll talk more about accommodating the inconveniences once we see how the application works.
Quick Start
This section provides a short YouTube video on quickly using the Microsoft Translator. Later sections provide additional details on the applications options.
The following sections expand on how to use Translator to communicate via the Microphone locally (the other person is with you).
Microsoft Translator Step by Step
This is the initial screen presented when you open the Microsoft Translator App. There are 4 ways to you can use the Translator: Communicate via Keyboard (locally), Communicate via Microphone (locally), Communicate via Microphone (remotely), Translate a Document. This post covers only Communicate via Microphone (locally), for more details on Communicate via Microphone (locally) or the other 3 functions see the Microsoft Translator Reference post.
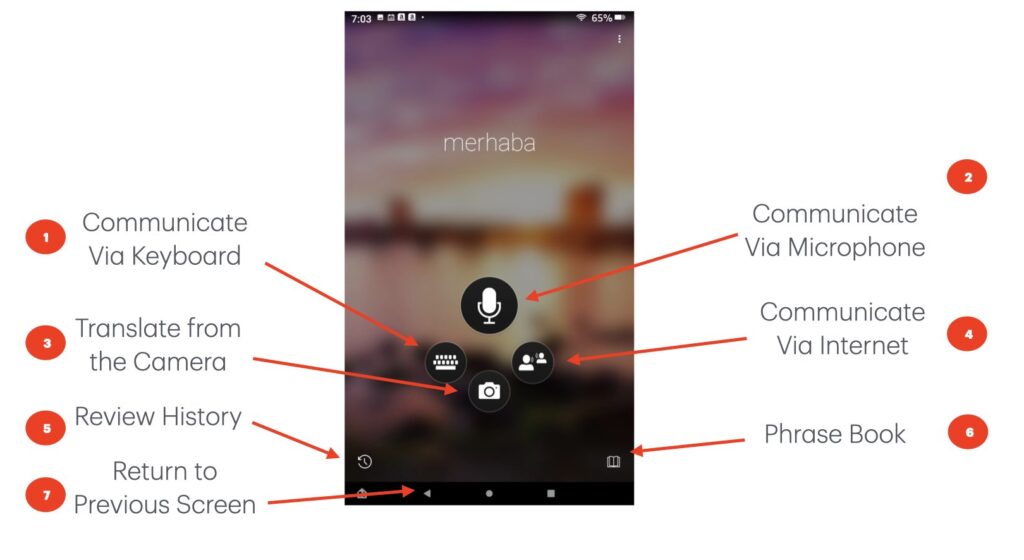
The graphics in this post are the same as in the Microsoft Translator Reference post. Although the pictures will identify all options, only those necessary for beginning to learn the Translator app are explained in this post. For more details refer to the Microsoft Translator Reference post.
- The Microphone button (#2) allows you to communicate via the Microphone
- The review button (#5) displays a history of your translations
- The book button (#6) displays a phrase book (useful phrases)
- The back arrow (#7) returns you to the previous screen in the app.
Conversations using the Microphone
Using the Microphone (#2) is by far the easiest way to communicate, however, deliberate enunciation is key to successful translations. If you have problems with this because of a physical issue or a heavy accent you may need to fallback to using the keyboard.
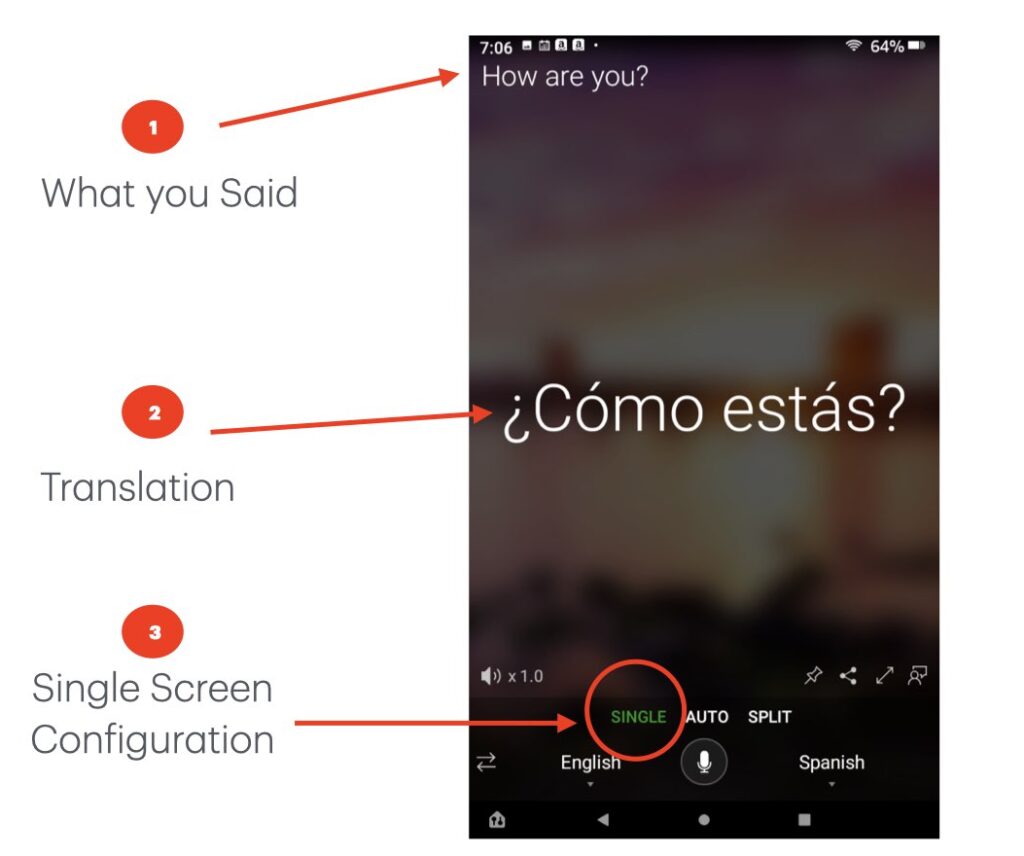
This is the entry screen for microphone translations. You press the microphone icon below the “Auto” selection in the middle of the screen to enter text; speak your message; and press the microphone icon again when you are done speaking. Your text, as interpreted by the voice recognition engine, is shown at location (#1) and the translation is displayed at location (#2). This configuration is referred to as Single Screen Configuration (#3). You would need to pass the tablet back & forth for both of you to see the screen.
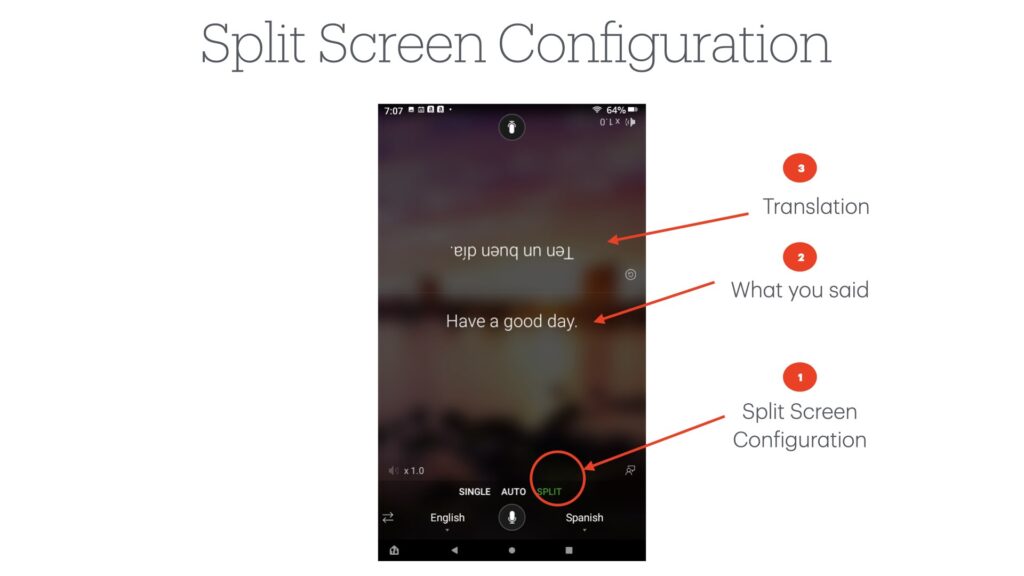
In the Split Screen Configuration the screen is effectively split in half with each side being able to sit across from each other and communicate by alternating pressing the associated microphone key on your side of the screen to speak and to end the message.
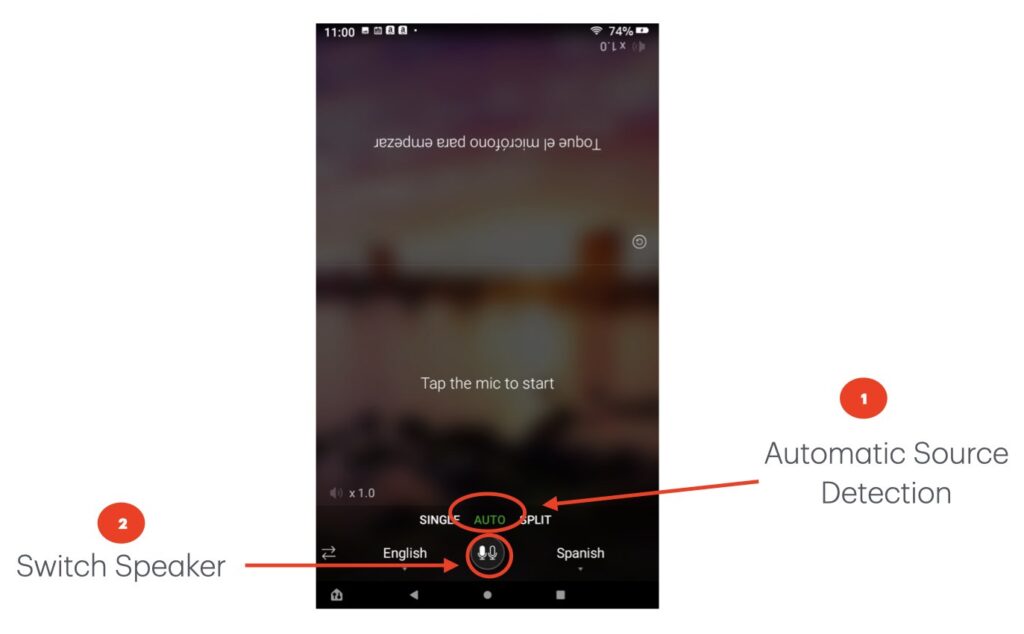
Auto Screen configuration allows the voice recognition engine to determine which voice is speaking and translate the spoken message into the other language. This is the most automated approach, but is somewhat more sensitive to misunderstanding. Some have had great success with this while others have struggled. You will need to determine if this mode works for you.
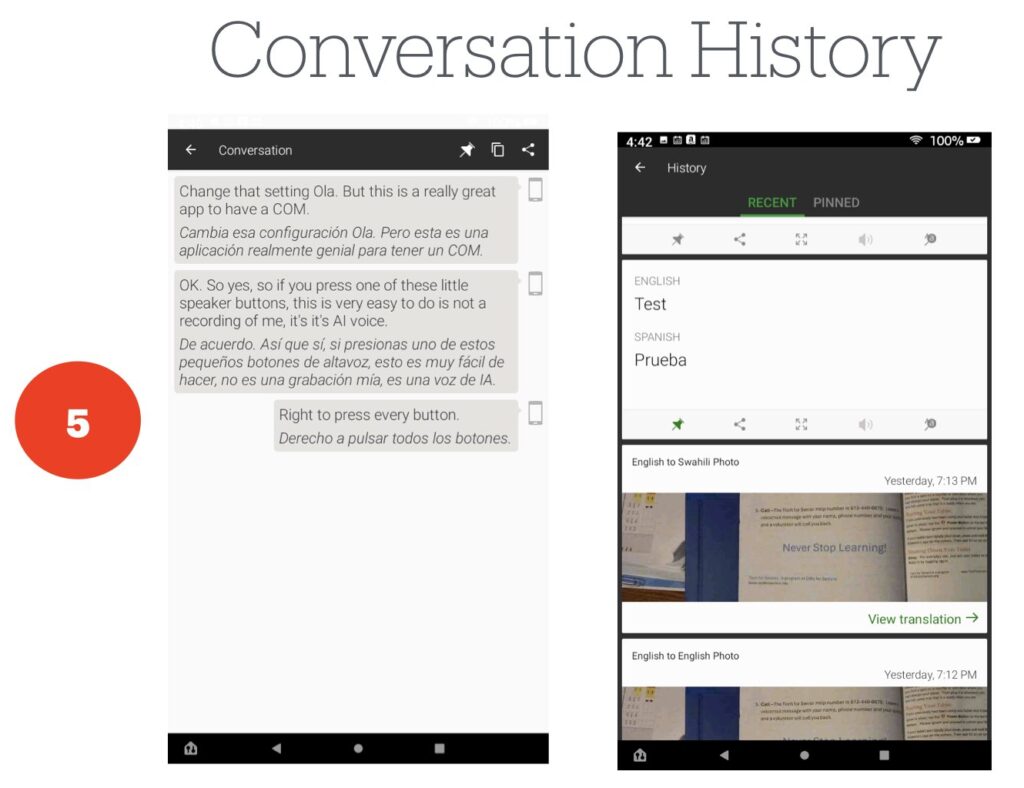
Option (#5) lists the history of the conversation, which allows you to refer back to early pieces of the conversation. Here are examples from 2 different conversations, one of which included a document translation. You can see both the original text of the document and the translated text.
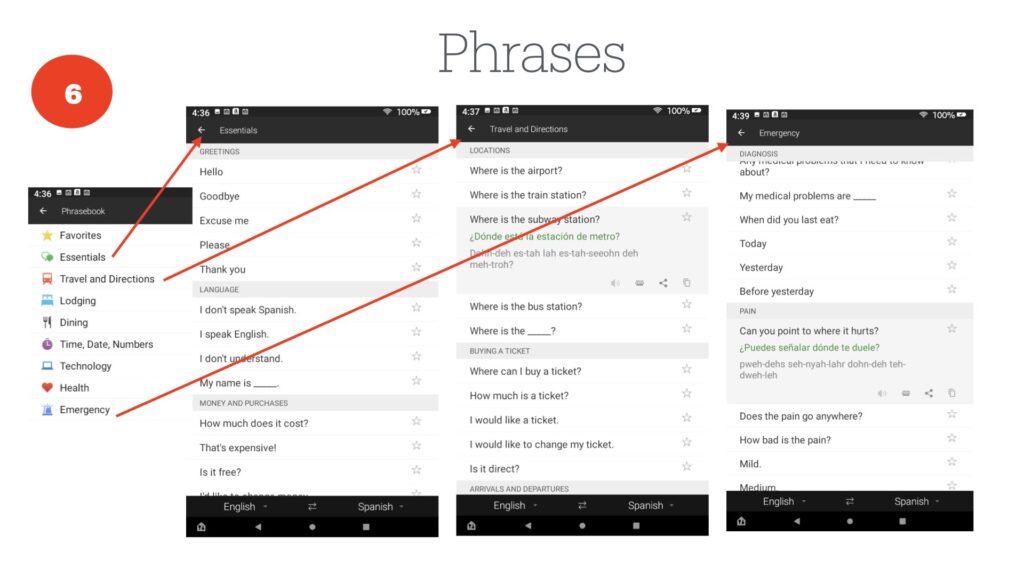
Option (#6) provides a useful cheat sheet of common phrases that you and quickly locate to help you communicate. Here we have selected a couple categories to illustrate how these phrases can assist you in everyday conversions.
Accommodating the Inconveniences
Although the Microsoft Translator App is reasonably easy to use, you may run into difficulties since there is an AI engine used for voice recognition and translation. The most common issue we see is speaking too fast; remember to slow down and deliberately enunciate your words. As you gain more experience you will likely be able to speed up, but slow down to start with.
Since there is technology involved, your message may be misunderstood or somehow misaligned with your context. You can always go back and check the History to assure that your message was interpreted by the voice recognition engine correctly – does your input make sense to you? If not, the translation will likely be skewed as well. Don’t be afraid to ask if your message was understood and made sense or to restate it in an alternative way.
Hopefully this post helped you understand how to quickly use the Microsoft Translator. Like most apps, you need to use it for a while to become comfortable. We recommend you use your tablet to practice by following this tutorial. If you don’t know how to do that we are creating a separate post explaining that.
Help
If you need help, use this link to reach out to us:
Never Stop Learning!
