
Using the Camera Application
The Camera Application is a reasonable quality still and video camera you can use to record memories. It’s actually easy to use and provides reasonable results without knowing a lot about photography. You can take lots of pictures and easily delete them if you don’t like them.
If you learn about the Shutter Button, the Selfie Icon and the Delay icon, that is usually enough to begin to take good pictures. We do touch on more options in the lesson for those who are interesting in some more advanced techniques. Be sure to also review the Gallery Application lesson to know how to view and manage your pictures and videos.
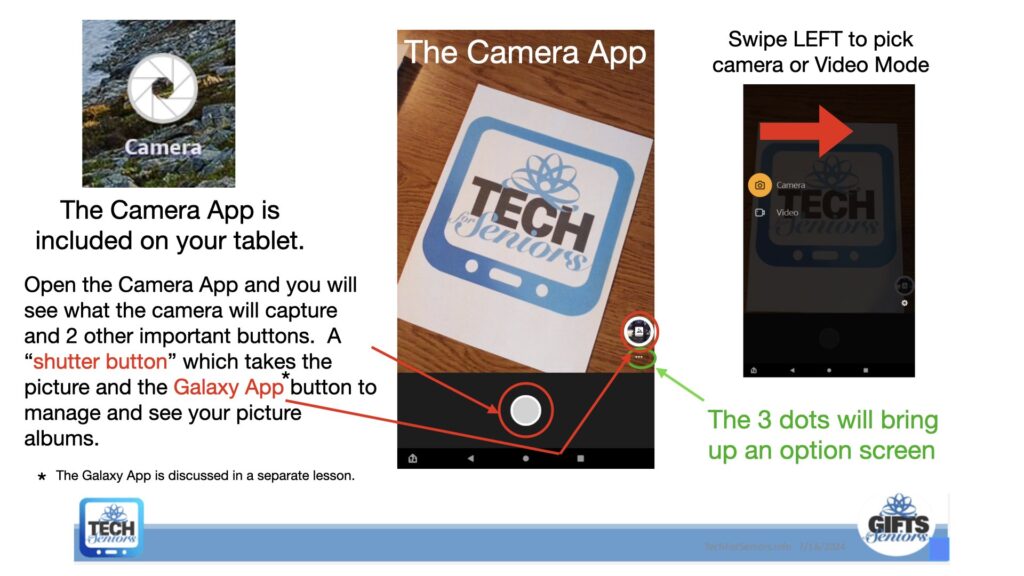
When you open the Camera App you will see a picture like the one in the middle of this slide above. To change the function between camera and video recorder, swipe in from the RIGHT side of the screen (the slide is wrong). This will bring up the Camera & Video icons on the left side, and a Settings Gear icon on the right side of the screen. Tapping this gear icon will bring allow you to control Resolution & Quality settings and the Manual Exposure option. You don’t need to worry about these unless you are doing some serious photography work.

The Options Screen allows you to control how the picture is taken. The Timer icon allows you to select a delay after pressing the Shutter Button before the picture is taken. You can choose 0 (no delay), 3 or 10 seconds. This is great for setting up the tablet to take a group shot with you in it. Set the delay (10 seconds perhaps), position everyone in the picture, press the Shutter Button and get in the picture yourself. It’s great for group selfies using the normal (front) lens.
You can also use the “Selfie Button” to reverse the camera to point back at you. Hold the camera to position the picture and push the Shutter Button. It will take a picture of you looking back at the screen. You can use the Delay icon to allow you time to reposition the picture after you press the Shutter Button.
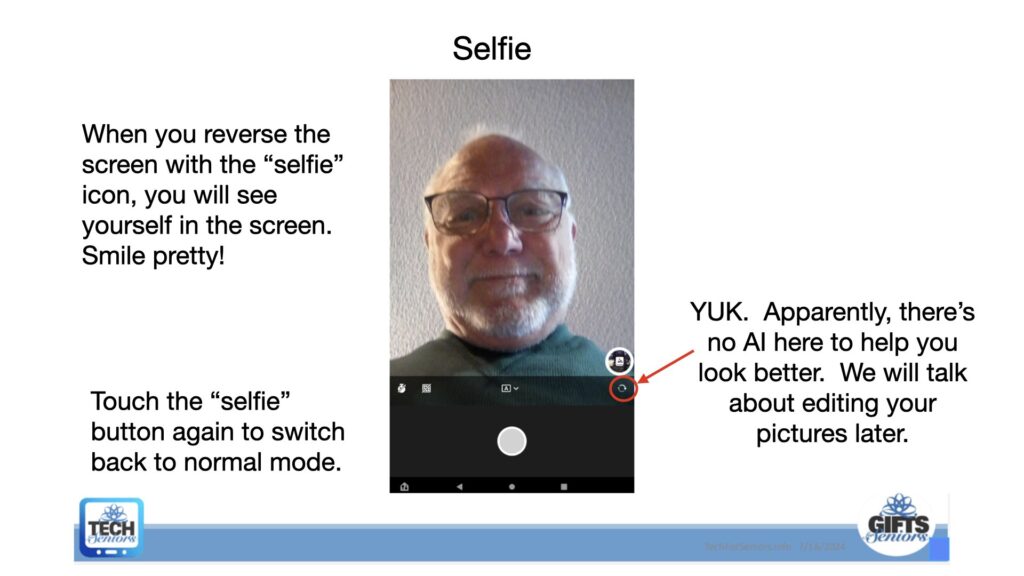
Setting the Delay Icon to 3 or 10 will give you time to assure you are looking good. I guess I didn’t wait long enough?
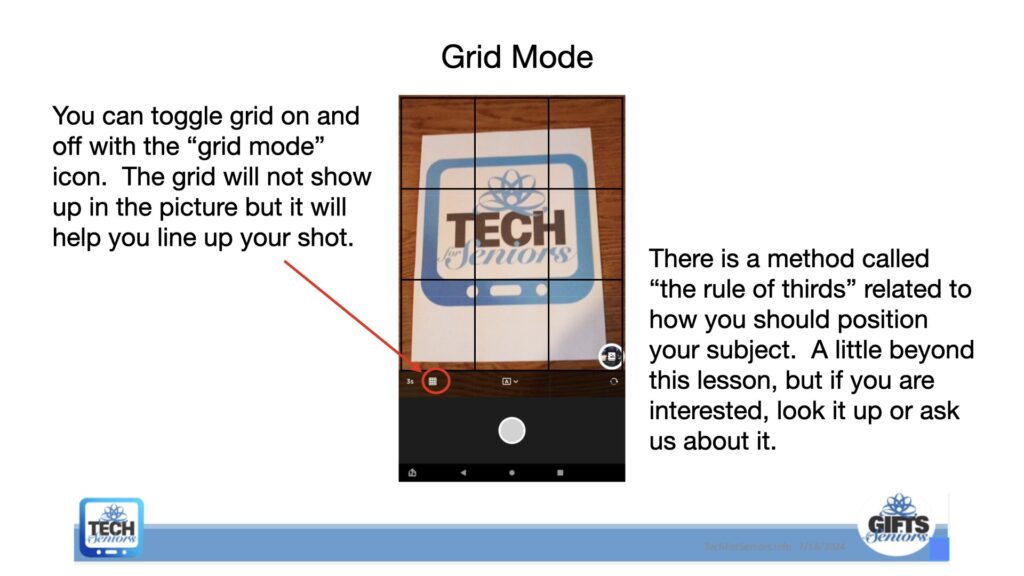
You can toggle grid mode on and off using the Grid Mode icon to line up the picture and make sure everything is centered and straight. Since the grid has 3 horizontal squares and 3 vertical squares you can play with “the rule of thirds” to take more creative pictures.
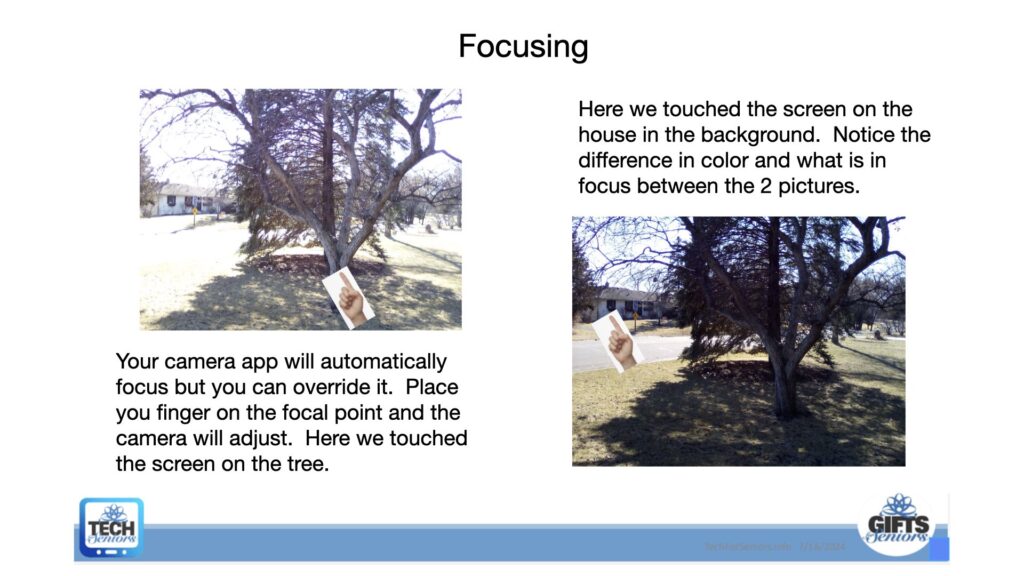
While you don’t need to worry about this to take a lot of pictures, you can hold your finger on the screen where you want the focus to be and the camera will adjust to your selection. In the picture above on the left I put my finger on the tree trunk. You can see the trunk of the tree very clearly while the house in the background is a little fuzzy
For the picture on the right, I touched the screen on the house in the back of the tree. You can see how the camera changed to show more detail on the house and less on the tree in front. Again, you can take pictures without worrying about this but it is there if you like to experiment with photography.
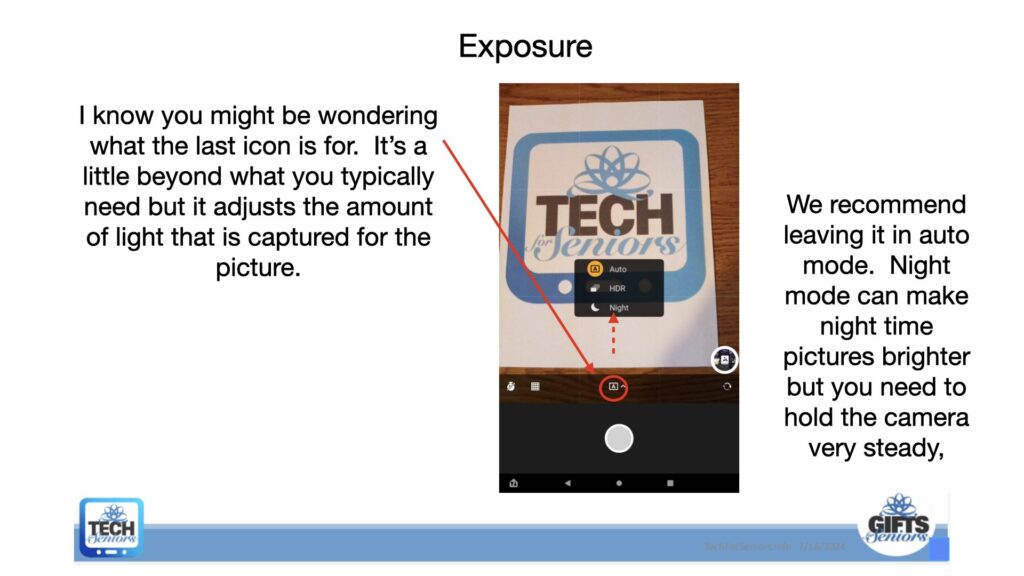
The Advanced icon shown above give you more options. If you are taking pictures at night the “Night icon” allows the camera to collect more light, making the pictures better. Leaving the camera in “Auto Mode” is generally sufficient for most pictures and is one less thing to worry about.
Help
If you need help, use this link to reach out to us: