
On-boarding new Learning Communities
Last updated on December 30th, 2025 at 05:21 pm
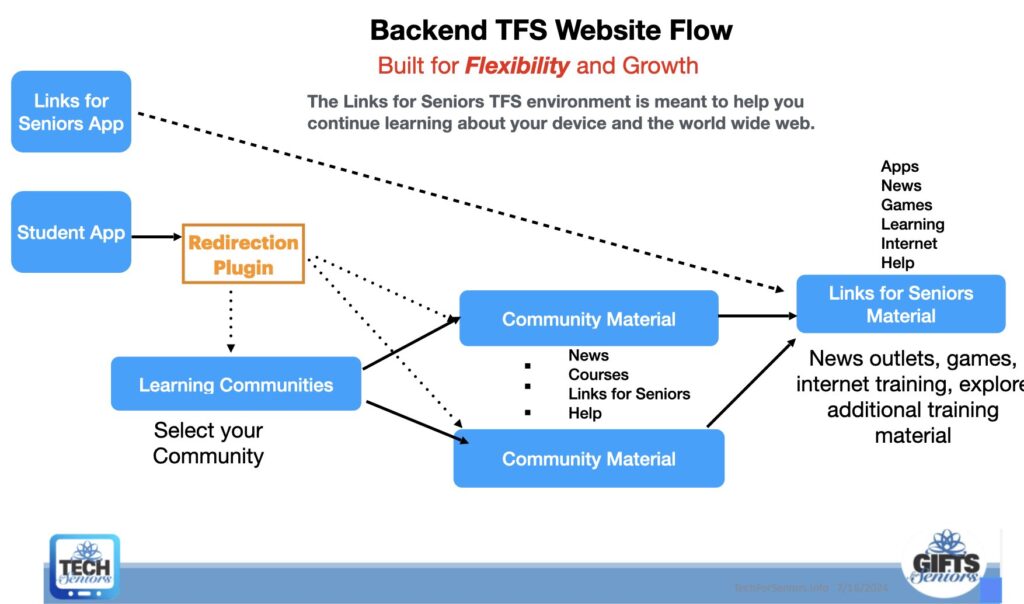
This document describes the activities needed to perform when adding a new learning community. We continually try to simplify this process. First, here is an overview visual of the current environment, more detail is available in the DOC – Web Application Flow Page.
Before we begin – take a backup of the system!!
To bring on a new learning community we need to update the “Learning Communities” Post to include the new community and then build a new “Community Material” Post.
First, we need to add a Post for the new learning communities. This documents how this is done for one new learning community, but the process will need to be repeated for each new community. The process is very straight forward. Communities can be easily found using the “Community” category (see the screenshot below). Note that the Community LInks/Landing posts should be assigned to ONLY the Community Category, since it is a node in the URL (see later topic). To simplify the process clone the Community Post Template post.
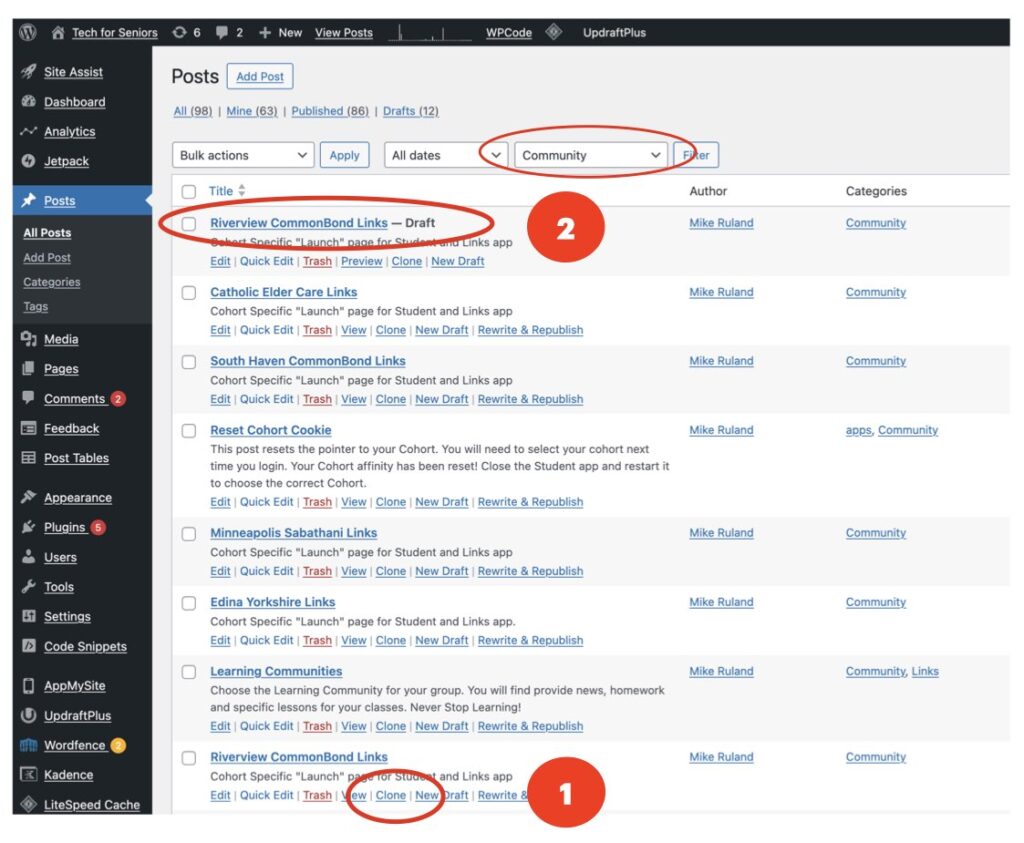
When you clone the Post (#1), you will see a new “draft” Post that you can edit and modify to accommodate the new community (#2). Note that the Yoast plugin needs to be active to clone the post.
Note that we cloned an existing Community post (Riverside in this example). This changed when we added the ability to customize the lesson plan for individual communities using the Community Post Template.
Next edit the new Draft Posts and make the following modifications:
- Change the name of the Post (#1) (this will be the name it is identified by).
- Change the name of the Cookie for this community (#2)
- Change the picture of the class (#3) (you likely won’t have one) so remove the picture of the community that you cloned from
- Change the heading for the class picture (#4)
- Change the information about class times and subject (#5)
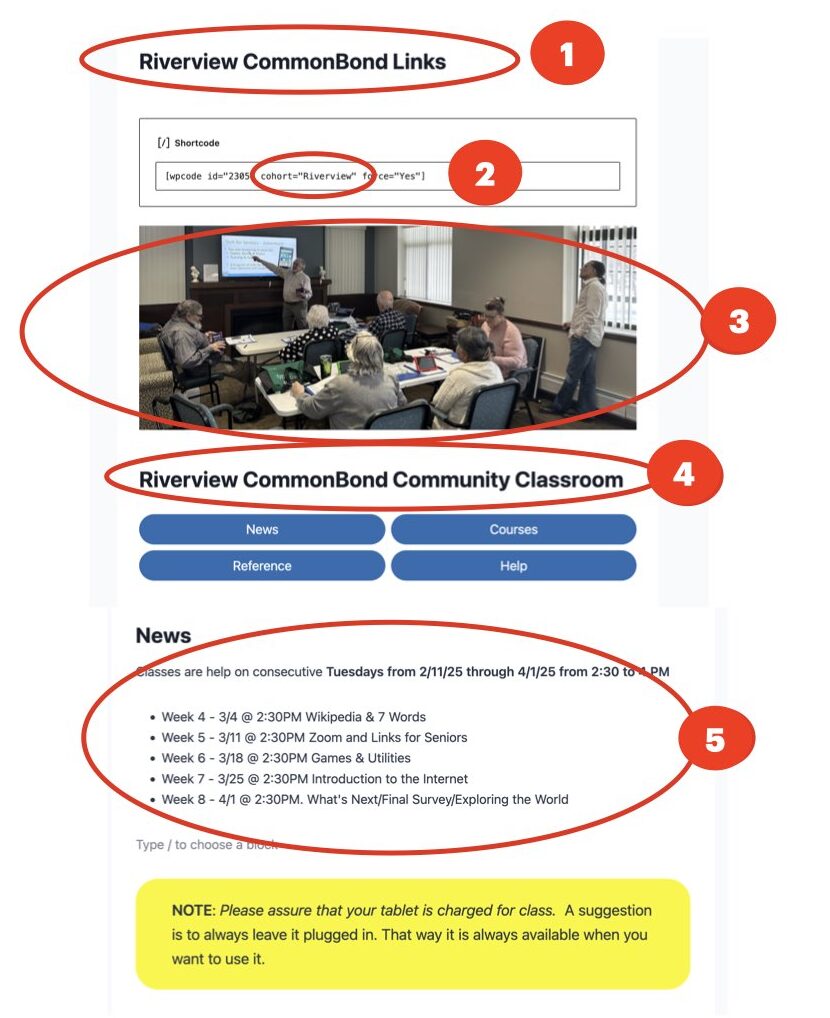
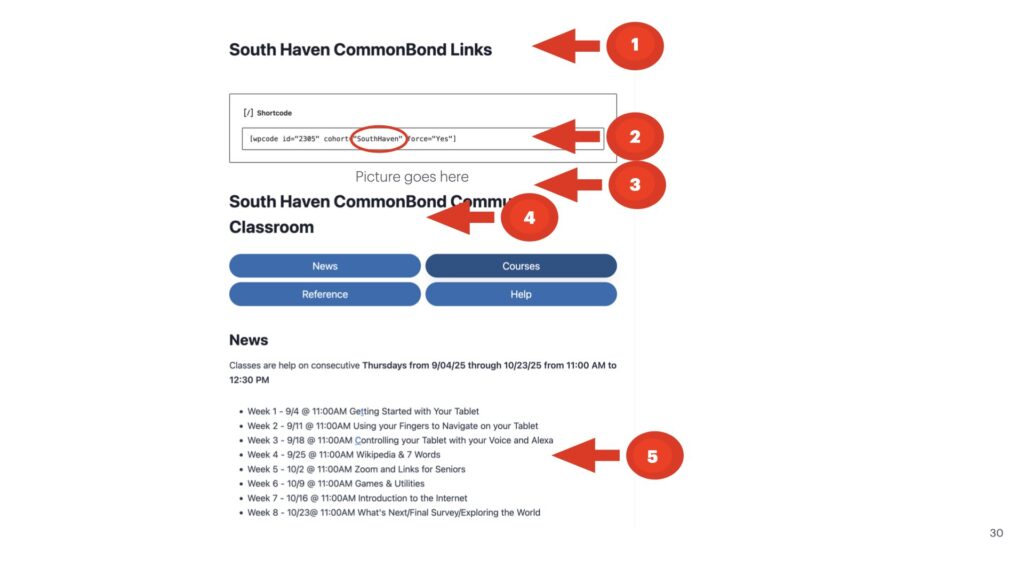
When you are done, the new page would look similar to the one shown below. This process needs to be done for each new community. Note that there is a CodeBlock at the beginning of the Post concerning cookie management. You likely won’t have a picture of the classroom at first so you will need to add it later.
More on the Community Cookie
With the implementation of cookies, we can remember which Community the student belongs to, there are a couple of additional steps needed during onboarding. This shows how this is implemented; first here is the short code that sets the cookie.
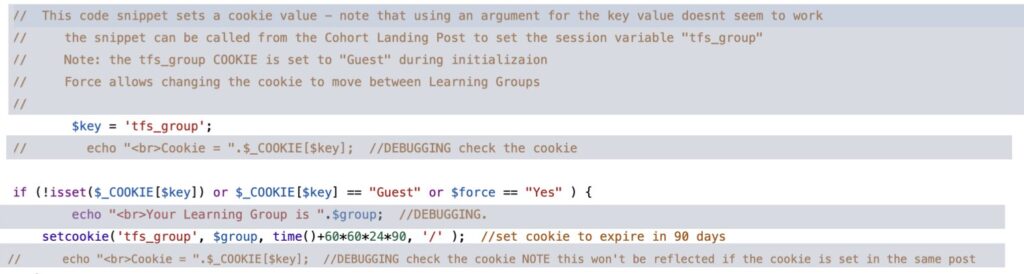
The code block is inserted after the Post name and before the picture of the Community. It calls Code Snippet “2305”, “tfs_setcookie” and passes the token (“Riverview” in our example above) to use in the Cookie “tfs_group”. This cookie is then stored on the students tablet to automatically route them to the appropriate Community Link post. We currently keep the cookie for 90 days or until the cookie is cleared on the tablet application. Note that the Community LInks/Landing post should be assigned to ONLY the Community Category, since it is a node in the URL. The Cookie is then use by the Redirection Plugin to transfer to the appropriate Community Links page.
Now that we have assigned the Community a cookie value, we need to add a redirection rule to the system. Here is what Sabathani’s rule looks like.
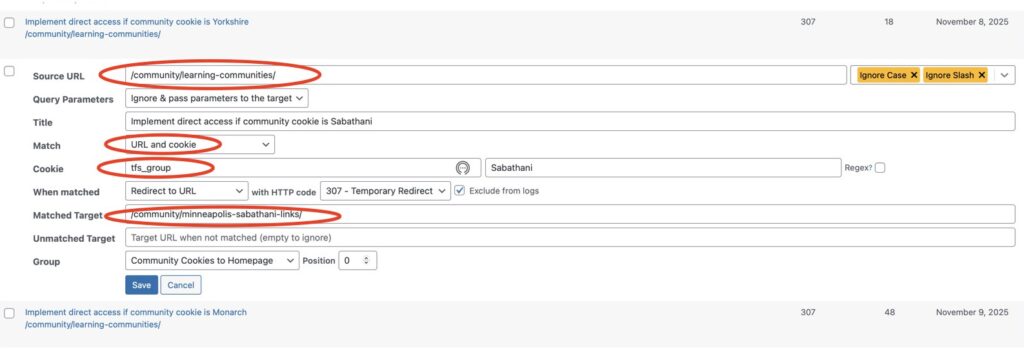
The 2 major pieces to change are the value of the cookie (Sabathani in this example) and the “Matched Target” which is the “slug” of the Community Post you just created.
That’s it! So clone; insert new community name/token/schedule; and add redirection rules.
Updating the structure
Now that we have our new communities defined we can add them into the infrastructure. We have to change the “Learning Communities” WordPress Post to include the new communities. When editing a Post, be sure to turn on the outline view (the icon on the upper left of the menu bar next to the”Design Library”. We need to move the previous learning communities from the upper area to the lower, older section and change the names and links in the top 2 buttons to the new communities you just created.
First drag the sub-buttons the upper right area (#1) and to be on top of the second button group (#2); this has already done in the picture below. Next add 2 new sub-buttons to the first button group (#1) also shown below. Then click on the button itself and type in the name of the new community.
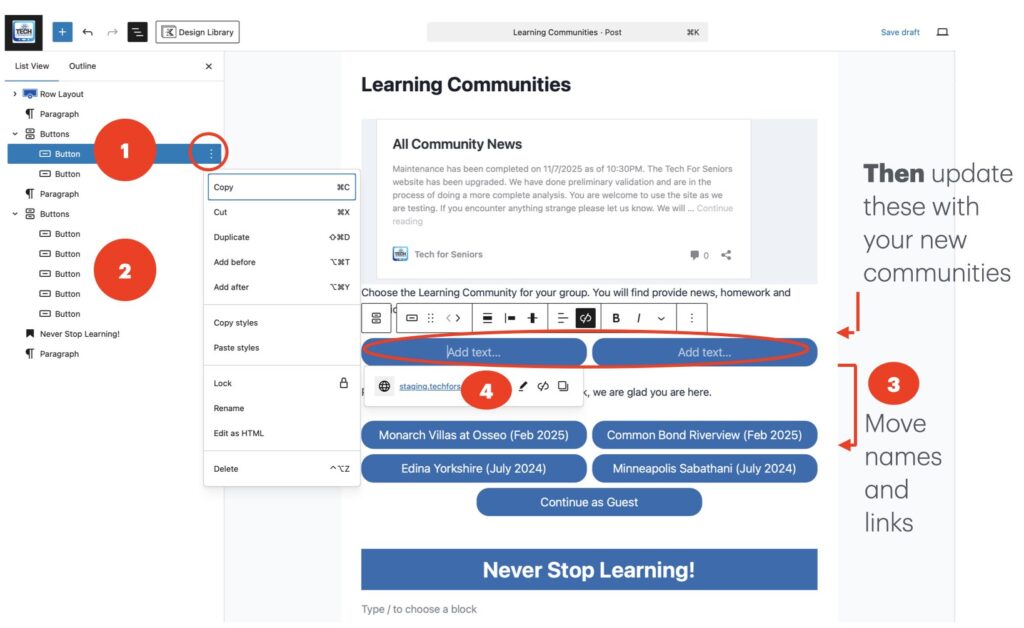
Finally, we need to add the “stub” (or URL) to the Community Post you created earlier (#4). You can get the “slug” from the Community Post you created earlier as shown below.
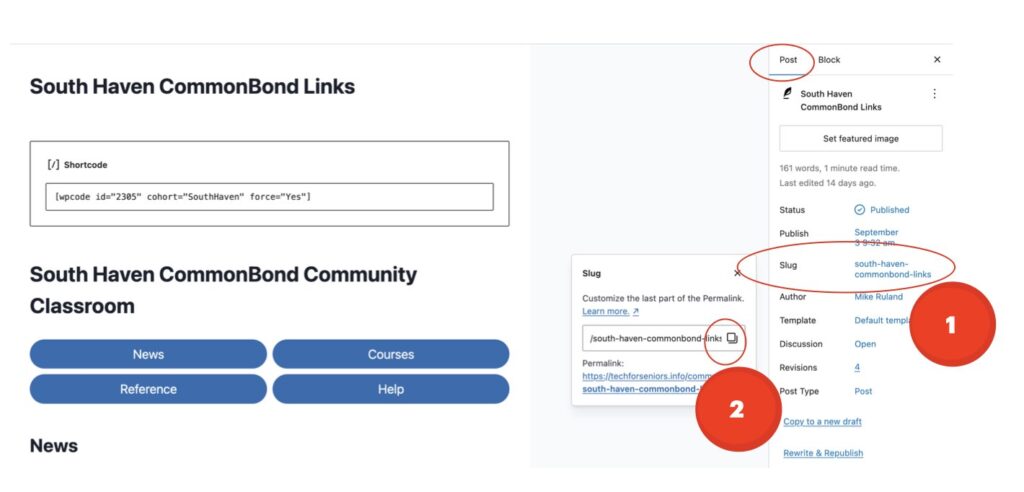
On the upper right hand side of the Post, select POST, you will see the “Slug” for your new page, select the slug (#1) and a new prompt will appear, select the copy option (#2). Now that you have the address, return to the Learning Communities page and associate it with the correct button (see #1 and #4 in the previous screenshot).
Save your work and test using the “View Post” function -see diagram below. Be sure to test all the buttons to assure that they are pointing to the correct posts.

Attaching the new communities to the apps
We have removed the need to change any of the Pages associated with the Student App (fire-learn) or the Links for Seniors App (Links-App).
Homework
Refer to post DOC – Customizing a Community Lesson Plan for a discussion on customizing lesson plans and homework.
Summary
Basically the flow is to first create a new learning community WordPress Post for each community by cloning a current one. Then updating it with the information for the new learning community. Finally, update the Learning Center Post.
And of course…..
*Always test things after making changes. Review Resetting the Student Cookie Post.