
Taking Ownership of your Fire Tablet
This topic will walk you thought the steps for registering your Amazon Fire tablet with your own Amazon account.
Congratulations on considering this step! This should only be done after talking to Tech for Seniors Navigators or Staff. We want you to stay safe while we celebrate your learning.
Background
Every Fire tablet needs to be registered to an Amazon account. An Amazon account is the same account that you might use for shopping on Amazon, reading Kindle books or even watching video on Prime Video.
When your tablet was provided to you, it was already registered under a shared Tech for Seniors Amazon account. All TFS tablets share a single Amazon account. This provided some initial benefits like:
- All tablets were set up the same, helping with group training.
- Setup was easier eliminating passwords and logins.
- Added safety could be provided with controls over what could be accessed.
There are restrictions in this approach. For example, you could not shop on Amazon or purchase Kindle books to read on the tablet. Additionally, some functions in Alexa, like reminders and lists were not practical.
Experienced Users
Experienced tablet users will occasionally ask for capabilities not available in the standard shared setup. A better approach for users looking to explore more capabilities is to register the table with the user’s personal Amazon account. This means that you are taking full ownership of the tablet. This is something that Tech for Seniors would celebrate! This is a good thing.
This also means that:
- Each tablet has its own Amazon account and the user profiles are private.
- Purchases on Amazon, whether books, merchandise or movies can be charged to the users account and credit card.
- Individual customization is possible.
This step is not for everyone but may be good for anyone who feels confident in their skills with the tablet. Also, this step does not cost anything, although Amazon purchases you make after the switch will need to be paid for.
Tech for Seniors is Still Here
If you decide to take this step, know that Tech for Seniors and its programs are still available to you. You can attend TFS popup tech clinics or use the telephone support line. Nothing changes in the relationship.
How to Reregister your Tablet to Your Amazon Account.
Here is a quick summary of the necessary steps. We will then show you the step-by-step actions to make this happen on the tablet.
- You need an Amazon account. This is the email and password that you use to log onto Amazon. If you don’t have an Amazon account, you will need to create one.
- You Deregister the tablet. This unlinks you from the Tech for Seniors Amazon account. The tablet will run but doesn’t work very well in this state.
- You will register to your own account. You will need the login email and password for this.
The good news is that all of your apps will continue to function after the switch. But be aware that some functions like the calendar and Alexa lists and reminders may need to be set up again.
Step by Step Action.
1 – Amazon Account
Have your Amazon account email and password ready. If you need to create a new Amazon account, visit the official Amazon Registration page.
If you have an Amazon account already, it is recommended that you confirm the password by logging onto the Amazon website.
2- Deregister your Tablet
It sounds a little scary but there is an actual Deregister button that you use to unlink the tablet from the share Tech for Seniors Amazon account. Here is where to find it.
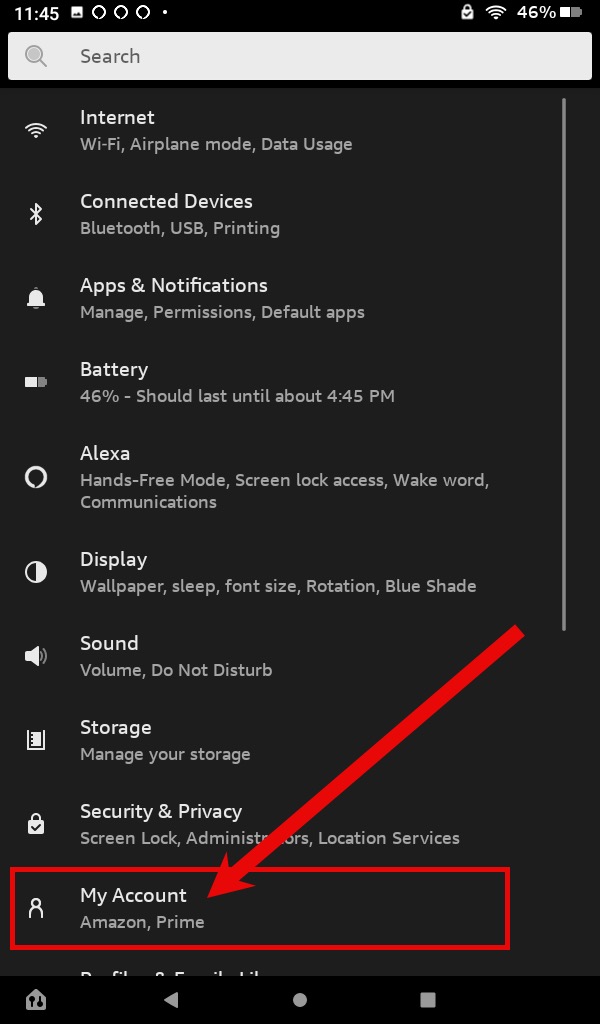
Find the Setting icon on your Home screen (it likely is in a folder) and tap it.

If you are presented with a blue passcode screen, tap 3123 to proceed.
From the Settings screen, tap on My Account. (see below)
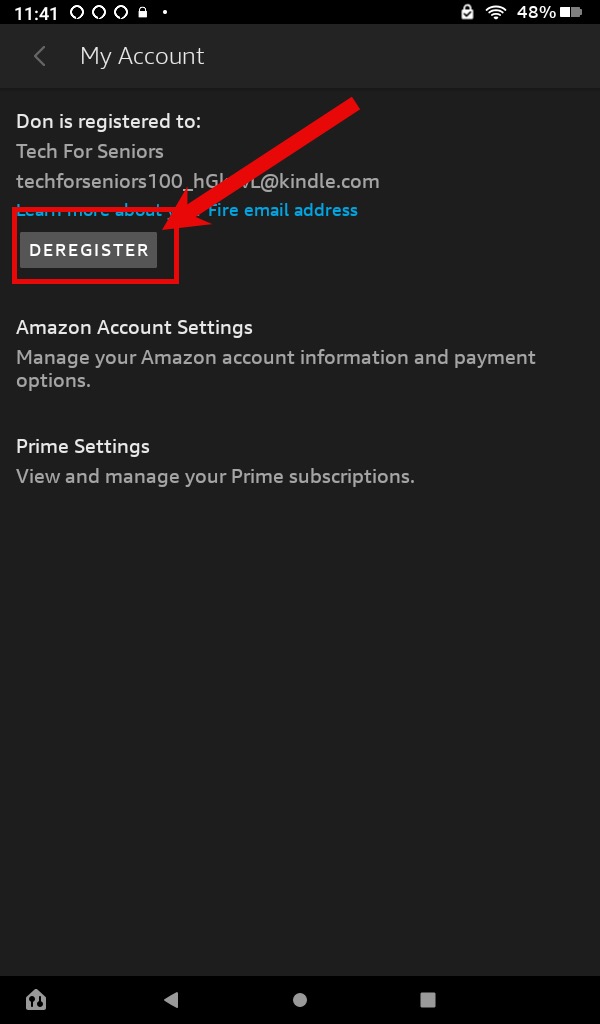
Tap on the Deregister button from the My Account screen
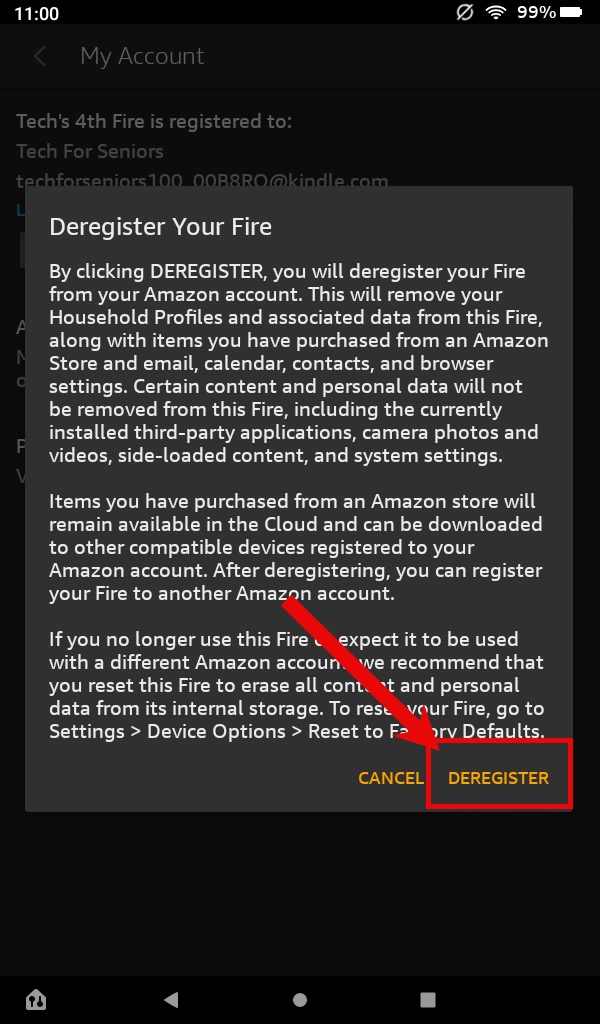
Confirm the Action after reading the confirmation message by tapping on Deregister.
3 – Register
Following the deregister step, the tablet will be removed from the Tech for Seniors account. You will tap the Register button to launch the registration process.
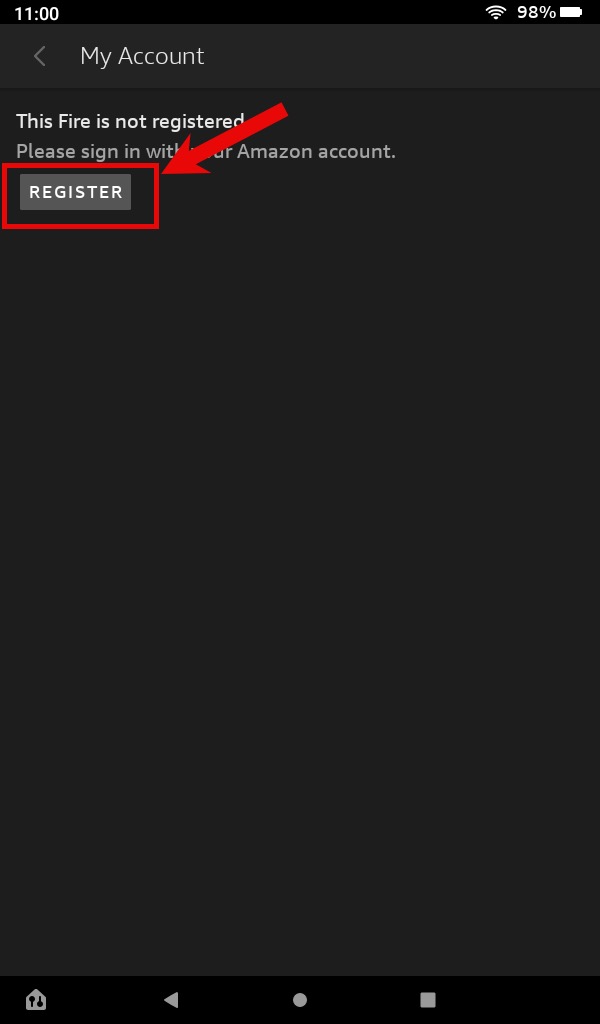
You will now see a screen where you can enter your email and password for your Amazon account. Tap Continue to submit and complete the registration.

New Set Up Steps
Following this process, the tablet will take you through a normal first set up process that starts with an introductory video. Tap Continue.
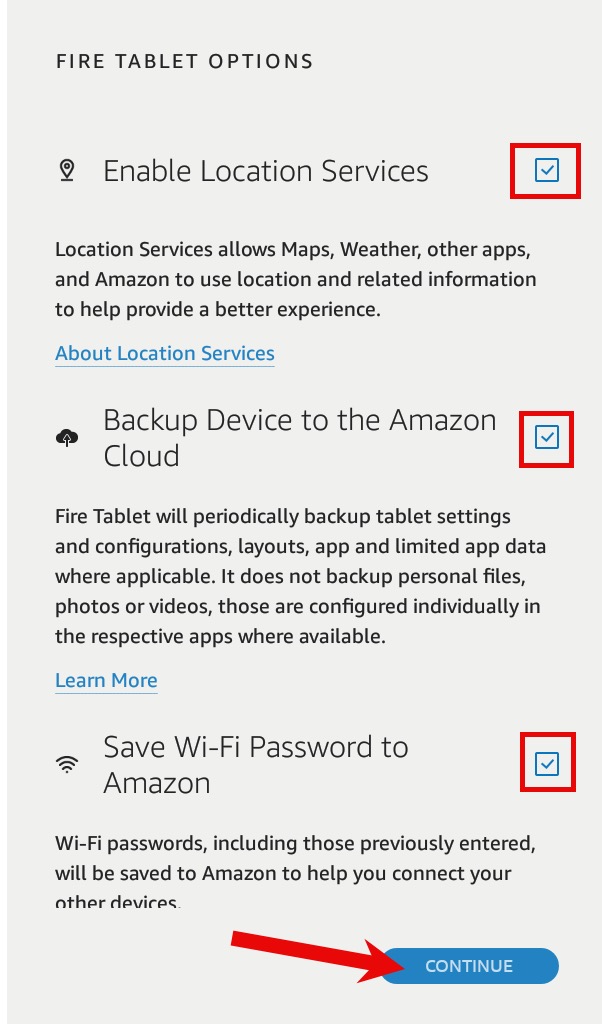
You are then presented with some setup options. We would recommend that all of these settings, location, backup and WiFi are activated.
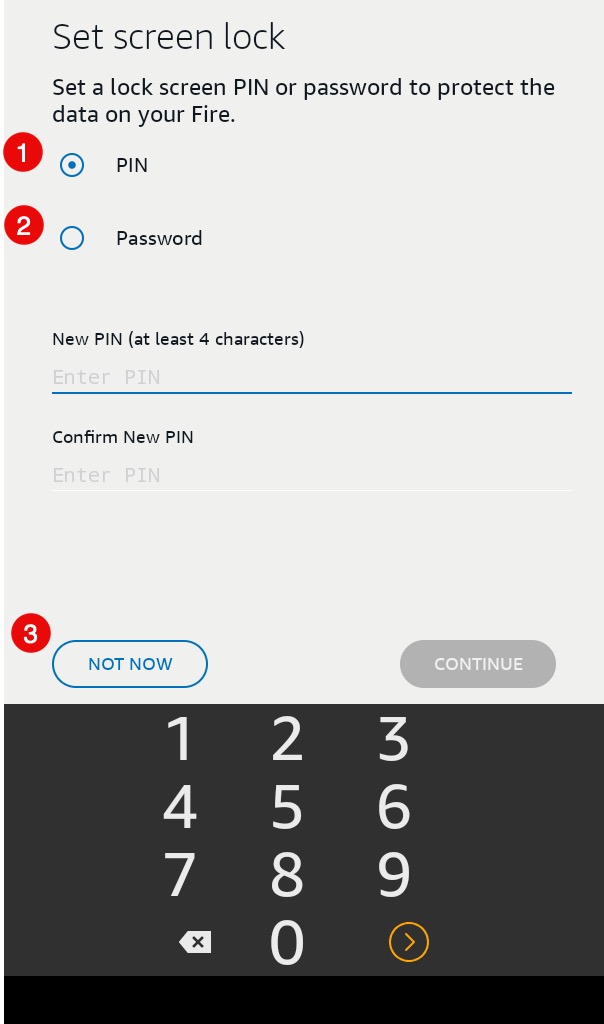
And then an important decision is if you want to put a pin or password to secure your tablet. Your options are:
- Pin – Usually a four digit number that you can easily remember.
- Password – a conventional password combining letterrs and/or number.
- Not Now – Tap Not Now to leave the tablet unlocked and only require the swipe up to access the Home screen.
Make you selection, create a pin or password and tap
With this action you are presented with some sales opportunities for Kindle Unlimited and Audible audio books. We were recomment that you decline. There will be plenty of opportunities to explore these paid services later.
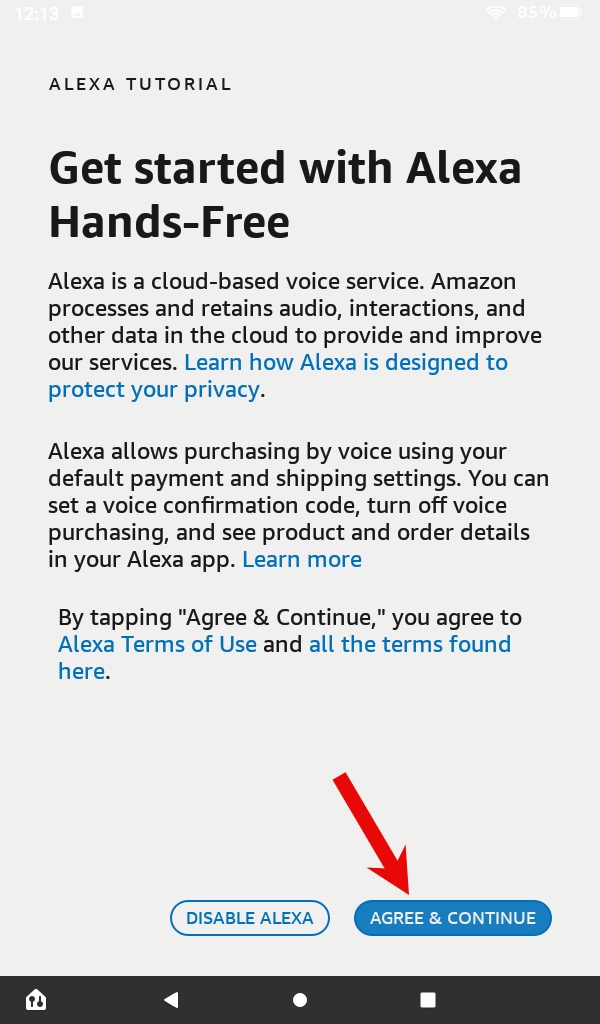
Finally, you will want to enable the Alexa Voice function. We would recommend that you read and understand this information but we also recommend that you want to enable the Alexa Voice function. Tap Agree & Continue.
This completes the registration process that links your Fire tablet to your personal Amazon account. This will open up hundreds of new capabilities for shopping, books, additional devices and more.
Have fun playing and remember…..