
DOC – How to use the Staging Environment
A “best practice” for computing systems is to introduce and test changes to the system in a separate environment to avoid outages and operational inconsistencies. The process described here suggests doing ALL changes in a Staging environment, test them there, then promote them back into Production. Several Plugins in production are disabled then after promotion since changes to production should be rare. The more changes you try to test on the Staging environment, the longer it is active and the greater the chance someone may have changed something in the production environment without also updating the staging environment. Once the staging system is promoted back into production any changes that were made in production but not in staging will be lost.
It is always tempting to just put the change, be it an update to a plugin or a change to an existing Page/Post directly into the production system. As long as you backup the production system before the change and test things out after the change, this can be expedient; plugin updates are a prime example of this. For longer development efforts or riskier changes you should definitely use the Staging approach; this is especially true of WordPress software updates since they are difficult to reverse. If you are using Staging BEWARE, any changes you make to production after creating the Staging environment will be lost unless you make the change to both environments.
Deleting an old staging environment
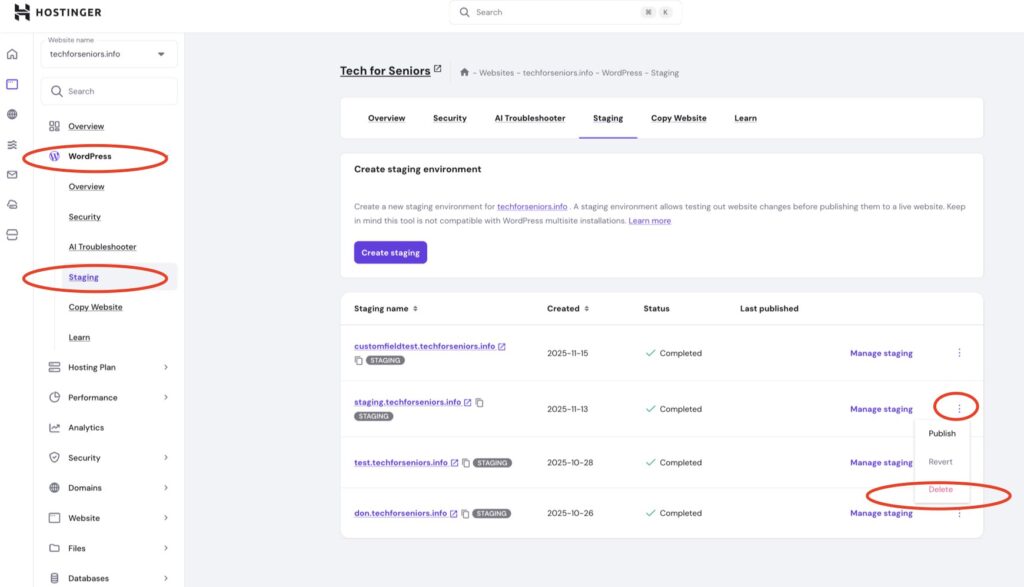
Before beginning the process, you may need to remove a previous staging area in order to create a new, clean environment. To do this you should first backup the current (old) staging environment. Next, from the Hostinger Admin panel choose “website”/”website list”, then “WordPress”/”Staging”. Finally select the three dots next to “Manage Staging” and finally choose Delete. This will remove the old staging environment.
Creating the Staging Environment
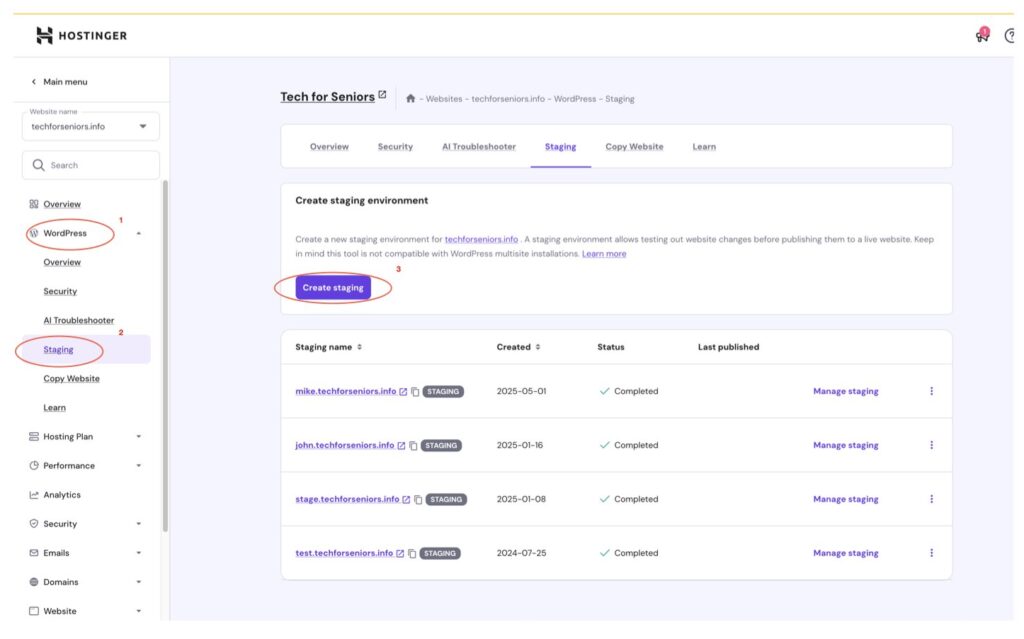
Changing a WordPress environment can be risky. To reduce exposures and web issues all testing should be conducted in a “test” or “Staging” environment. Our WordPress environment is hosted by Hostinger.com. Log into the Hostinger.com website and select the Website option (#1), then select the “Website List” option (#2). This opens up a sub-window where you can pick from the Website list. A list of the websites is displayed and you can select the “Dashboard” option(#4) for the “techforseniors.info” website (#3).

The Dashboard panel for the website is displayed. Select the “WordPress” Option and the “Staging” sub option. You can see (and manage) the current staging areas. The “mike…” environment is the one used to test this maintenance activity (5/17/25). Select the “Create Staging” button to create a new staging area. Note that recreating a new Staging environment generally takes about 15 minutes.
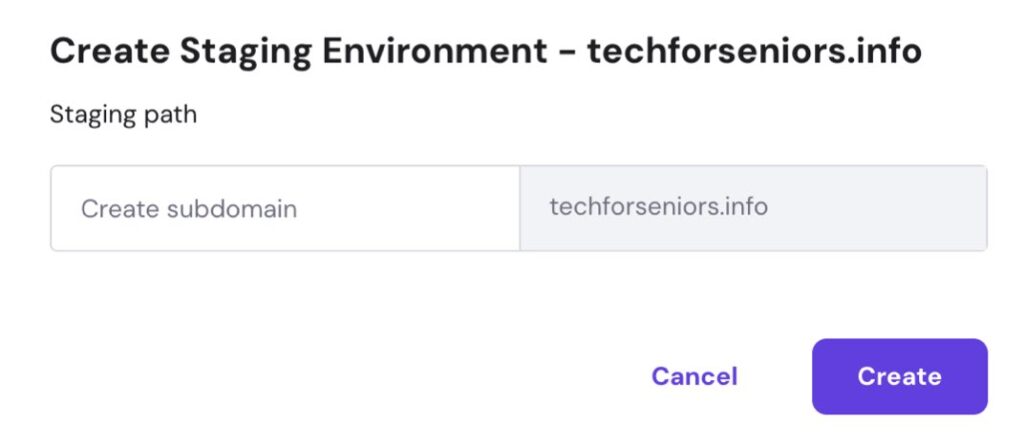
You will be presented with a box allowing you to specify the new prefix to the website. When we created the “mike” staging area, our website URL became “mike.techforseniors.info”.
Note that the staging environments we are creating are actually a subdomain within the techforseniors.info Domain. Since the Domain is backed up automatically every day, there is a backup – but it contains everything. Best to work with backups of the individual website (Domain or subdomain).
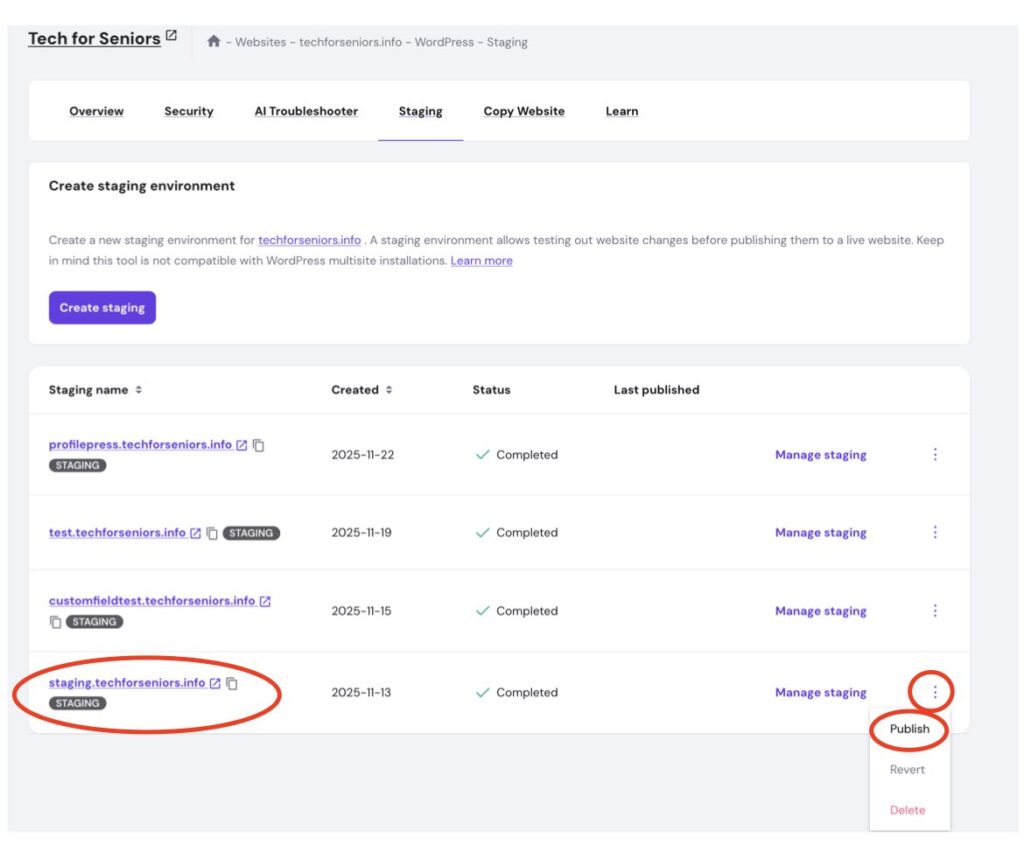
Make all your changes in Staging, thoroughly test the Staging system, backing it up occasionally before a major catastrophe or after a major success. When you are satisfied that it is working correctly backup both Staging and Production using UpdraftPlus. Once the backups are complete publish the Staging system into the Production system from the Hostinger website panel (see the screen shot below) – note that all content from Staging will replace that in Production. This is why you need to redo any changes made to the production system on the Staging system once Staging has been created.
Test the new production system thoroughly! Don’t forget to disable any Staging only plugins before opening up the Production system to the world and watch for broken links before disabling the Broken Link Checker plugin,.
That’s it.
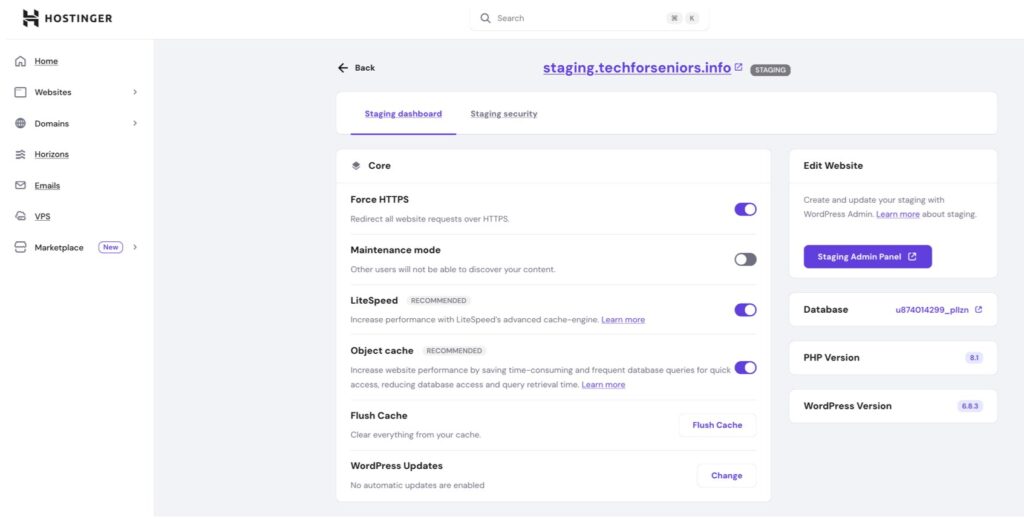
But while we are talking about Hostinger, there are a couple other things to look at. When we selected “Manage staging” in the list of staging environments, we are presented with the staging area management panel for the mike.techforseniors.info website. You can see that there are a lot of useful utilities in this menu.
Promoting Staging to Production:
Once you have finished updating your staging enviornment and are ready to update the production enviornment, use this checklist to promote your changes back into production. Note that promotion COMPLETELY overlays the production system so ANY changes made to it after the staging area was created will be lost if they weren’t also put on the staging system. That is why you need to be sure to back up the production environment prior to doing the promotion.